The Need for Farsightedness

When it comes to writing, don’t be too shortsighted.

A Diary of Writing Wisdom (and other nonsense)

#FOUR

The Need for Farsightedness

Human beings are naturally shortsighted. The current opinions are the ones we see in front of us, the ones that are discussed in current magazines and on social media. It is natural to concentrate on current trends and hot topics. But there are two disadvantages in doing so. One is that we fail to learn from the past; the other is that we fail to look to the future.

Interestingly, these two forms of shortsightedness are connected, for one of the clearest lessons we learn from the past is that the “normal” of one generation is out-of-date in the next. In theory this is not hard to accept. At one time or another we have all read books/excerpts from articles written many centuries ago and smiled at the quaintness of the ideas and the language contained therein; and we realize that our own generation would be unique were it not for the fact that it will appear equally quaint in years to come.

I wonder, for instance, what our descendants will think of the Zombie Apocalypse theory or of stem-cell research. It is difficult for us to see it as future generations are likely to see it. Robert Burns once prayed for the gift to see ourselves as others see us. It would be an even greater gift to see ourselves as people in the 23rd Century will see us.

When it comes to writing, don’t be too shortsighted. Learn from your past. Don’t just let it lay dormant. Incorporate what you’ve learned from the past into your script of today. Believe it or not, this looking-back approach can help writer’s generate even greater power to look ahead. It can help writer’s ignore the temptation to write only about current trends and hot topics. It can even help writers become less shortsighted and more farsighted—nearby distractions become blurry while the ability to see distant goals and objectives become more and more clear.

OC Maryland-001
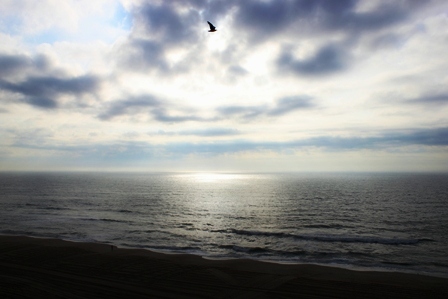
Ocean City, MD, 2014. 

Judas: Hero Misunderstood by @JERoyle

Jason Royle

Title: Judas: Hero Misunderstood
Author: Jason Royle
Paperback: 60 pages
Print Publisher: CreateSpace Independent Publishing Platform (August 18, 2014)
Language: English
ISBN-10: 1500884200
ISBN-13: 978-1500884208
File Size: 2035 KB
Print Length: 62 pages
Simultaneous Device Usage: Unlimited
Kindle Publisher: Jason E. Royle; 1 edition (August 17, 2014)
Sold by: Amazon Digital Services, Inc.
ASIN: B00MTCDRG6
Text-to-Speech: Enabled
X-Ray: Not Enabled
Word Wise: Not Enabled
Lending: Enabled


Judas: Hero Misunderstood is the story of a man out of history that is perhaps the least known about but one of the most significant disciples during the actual life of Jesus and what happened after that night in the garden, after the Judas kiss.

Jason Royle takes the reader on a journey of what if. Or maybe it really is a journey of what did happen. The style he chose to use is contemporary in the use of language and symbolism in order for anyone today to relate and connect to the story. Unlike many other takes that are similar to what Royle has done you don’t get a preachy style. At the very end, after the story is all done and over with, you receive a look at passages from the Bible to show you what may or may not bring credence to what Royle has written.

The story itself is a journey of what happens after Jesus has been taken away, what thoughts go through the mind of Judas, and what happens after his death. Where does he go? Who does he see? We see Judas, just like all others according to the Christian faith, answering for what he has done.

The manner in which Royle chose to do this is very interesting and relatable to today and I found the use of gender at times a surprise. For the Bible Belt the book should be something that doesn’t threaten what they believe, as if one studies their Bible perhaps they might come to similar conclusions as the author has for this book, or at list not so far off as to be offended.

The story is told to educate but in a ‘what if’ kind of manner. It is meant to get the reader to thinking.

I would recommend this book to anyone really. It’s an easy and quick read. I read it in one sitting and had little problem with flow or pace. I wanted to continue on. The beginning chapter or two were a little bit, I’m not certain if confusing it the right word. What the author wrote had to be written in order to set the stage for what was to come next, to get to what would really get us in the learning mode. The author had no idea I had agreed to review the book so there was no reason I had to read it as quickly as I did, it was simply that type of book. You just don’t realize you’ve done it.

Review Rating

1 being I would almost rather die than read the book and 5 being a superior book that truly excels to perfection.Judas Hero Misunderstood

Character Believability: 4
Flow and Pace: 4
Reader Engagement: 4
Reader Enrichment: 4
Reader Enjoyment: 4.5
Overall Rate: 4.1

Bio Back of Book Version:

Jason is the pastor of St. Paul’s United Church of Christ in Schaefferstown, Pennsylvania. A Social Worker before his call to full-time ministry, Jason received his Doctorate in Ministry from Sewanee: University of the South School of Theology and his Master’s from Johnson University. He and his wife, Heather, have two children (Katelyn and Nate) and one loyal but lazy dog (Rudy).

Ron_LWI


@RonovanWrites

on Facebook

on GoodReads

on Google+

Enter your email address to subscribe to this blog and receive notifications of new posts by email.

© Copyright-All rights reserved by litworldinterviews.wordpress.com 2015


Author Presence: Setting your #Blog Header Photo

Author Presence: Installing your Header Photo on Your Blog

The last time here you installed your Blog Theme and your About,me Widget. Now we are going to do that thing people think is so cool. We are going to install the Header Photo.

What you need to know:

Size: Header 990 width x 180 height pixels

File Type: jpg or png (yes jpeg and jpg are the same)

If your image is larger than this you will end up cropping it, which means cutting down to the appropriate size. In some Themes you can move the crop area around to get what you want, in some you can’t move it. Also in some the suggested size does not have to be followed but I don’t recommend that your Header Photo be so large it takes up your entire landing page screen.

What should your Header Photo be?

Some choose to include their image with a quote from some famous author. Or perhaps just the quote. If you have books already, you can include them. Some people simply put a nice image of something they like, or something that they feel represents them or captures their personality. As with everything else remember the word, professional. This does not mean professional quality necessarily, but professional in nature and content.

For my example blog I am going to use a peaceful image for now.

We are once more headed to the ‘Dashboard’ of our Blog.

Once in the Dashboard, since we are changing some type of appearance of the theme/blog, we are going to to go:

Appearance

Then Customize

You will not be taken to a very, shall I say ‘funky’ looking page that is nothing like what we have see so far. On the page you see the landing page of your Blog as it appears now. At the bottom you can click the three different little screen options to see how your blog looks in the different types of devices it will be viewed on.

To the right you will find the areas to be used today:

  • Custom Design-This usually requires a premium, meaning paid upgraded packages.
  • Colors
  • Header
  • Front
  • Widgets
  • Site Title

The first thing to do is go to Header. I think that is a bit obvious since we are dealing with the Header Photo. I say this to simply show you the obviousness of what we are doing and how easy it is to actually figure things out on your own if you wish.  One piece of advice. Take note of what Theme you are using, by this I mean write it down. You will be tempted to try other Themes for fun and end up deciding you liked your first Theme and will ultimately have no idea what that Theme is after looking at 20 or so different ones. (Yes, I have been there and done that.)

For Coraline after I clicked on Header I have some built in images I may use. Instead I will click Add new image.

In the middle of your screen you will see Select Files. Click it.

I loaded a photo my son helped me take. I was lying on the ground and he blew bubbles above me. Thus my Header Photo is of one of those bubbles.

Bubbles 1 - Copy


You now see what your page looks like in the ‘funky page’ window.

If you don’t like it, just try again.

The image is going to be very short in height. For example if you look at the image of the bubbles the only bubble i was able to include was the large one in the middle. That’s fine with me, but just keep that in mind when you are coming up with your images. yes you can, with Coraline, expand the height but it will take away from your landing page visibility. I like to have at least my first post heading and some content showing.

If you are, and once you are happy let’s go ahead and look at the Front option here while we are in the Customize ‘funky page’.

You can either have a Static, meaning the same thing every time someone visits page, or a Your latest posts landing page. This really is up to you. I use the ‘Your latest posts option’. But some of you might wish to have the Static page be for advertising your latest book with their then been being able to click the Blog button on the Menu around your Header Photo . . . the normal location.

I don’t do anything with the Widgets here. And we will discuss them another day.

Site Title includes what your Site is called, regardless of your URL address. And it also include your Tagline. Remember the Tagline can be what you are the author of or just some one line thing like your motto. For now I am leaving mine blank.

You will also see a box to check or uncheck. Display Header Text. On my Ronovan Writes site since my Header Photo includes Ronovan Writes I don’t display the text. But for this blog I will keep it for now.

Now click Save at the bottom right. Then click the X in the bottom right.

You should now be back at your Dashboard. To see how everything looks in full screen, click your Site Title in the Top Left corner.

The next time we will connect our blog to the About.me account. And possibly connect it to Twitter as well.

You may be wondering when will it be time to post something, write a blog post/article. I am of the mind to have the connections to everything set first and then I can devote my time to writing. Sure there will be times you will connect other Social Media to your site along the way, but we’re going to make this right from the beginning.

Here are dimensions to keep in mind for the Coraline images.

  • Header 990 x 180 px
  • Content area 500 px wide (Depends on if you have two sidebars. Otherwise you will need to adjust. If too wide your sidebars will then be shifted down below or disappear all together.)
  • Footers 220 px wide
  • Feature widget 450 px wide
  • Primary widget area 220 px wide
  • Secondary widget area 180 px wide

Much Respect

Ronovan

Enter your email address to subscribe to this blog and receive notifications of new posts by email.

© Copyright-All rights reserved by litworldinterviews.wordpress.com 2014


Author Presence: Putting your Blog Theme in Place.

Author Presence: Putting your Theme in Place.

Last time we met it was choosing your Theme for your blog. Let’s say you looked at the links I gave you and you picked one out. I’m going with the Coraline Theme for my example Blog. One of the things we might do today is install the About.me Widget, so go ahead and log into your About.me account in another Tab or Window. This isn’t a must today but I am going to cover it.

You are going to actually pick your blog and activate it on your blog today and chose the layout. All very simple.

  • Log into your WordPress.com Blog.
  • Click My Sites
  • Click The Gear on the top right of the image of your blog
  • Click Go to Admin Dashboard

Now you will see a long list of words on the left side. If you take a moment you will be able to do some common sense figuring out of things. For now, since we are going to actually pick out your Theme and apply it to your blog, we are going to change the Appearance of your Blog.

So guess which of those words we are going to click on?

Yep-Appearance.

Technically you don’t have to click on it, but instead just place the cursor over it and it will show your options, but either way works.

Click Themes

Now you are going to want to Search for your Theme.

On the Right side click Free. Now there is normally a Search field here, if not, you can do the search function on your computer, or simply scroll down until you find your Theme. I am going to choose Coraline.

Once I find it, I will place my cursor over it and click Activate.

I click the x at this point because I don’t want to Customize, which means things like Add a Header Photo.

Right now I want to choose the layout. Each Theme has at least one layout. If it has more than one option, then you will see under Appearance something called Theme Options.

For Coraline click Theme Options.

I’m not worried about that Color Scheme yet that is at the top of the screen. What I want is to take a look at the Default Layout. I can’t tell you which one to go with for certain here as you will want to pick your own flavor.

  • But I am going to choose the one that says Sidebar-Content. That means my Sidebar will be on the left and my Content, that is my posts/articles will be on the right.
  • Then I click Save Options.

Now you want to see what it looks like, right?

Look at the top left of your screen and you will see the name of your Blog. Mine says Ronovan Author. Click it. Now if you are in Coraline you will see some things already in your Sidebar. Don’t worry, you will be putting your own things in there but what’s in there at the moment is just fine.

Now you have a choice to make. You can do one of about four things right now:

  • Put a Header Photo in
  • Put your About.me Widget in
  • Write a post
  • Or really if you have had enough for the day, just stop. This post will be here tomorrow as well as the next day.

I think most people go straight for that Header Photo. Yes, that image is important, but I say let’s go with the About.me Widget. After all that time we worked on them, and even put possibly two images in there already, let’s put them to use. You are your image. Period.

Again we are back at the Dashboard and under the Appearance toward the bottom, right where we just left from. In fact you could click the back arrow on your browser to get there.

Once there you want to click on Widget that appears after you click on Appearance or hover over it with your cursor.

The About.me Widget is the easiest to find. Why? Because they are alphabetical. Yes, it’s the first one you come to. In the Coraline Theme on the right side I have Seven Widget Areas. I am only concerned with the Primary Widget Area right now.

  • Click on the About.me Widget.
  • Primary Widget Area is already selected so all you have to do is click Add Widget.

Under your Primary Widget Area on the Right your About.me Widget has appeared with a lot of information in it.

  • The ‘Your about.me URL’ is what you are looking at right now. Notice most of it is already filled out.
  • I know mine is Ronovan. So I just need to type that in. So log in to your About.me account and see what name shows up. Really it might say Home, but click on your name in the top right and edit and the name should appear in the URL.
  • Put that name in and click Save. Now let’s go see what it looks like.

Now all of that stuff that was there before is gone. Your image is there along with your bio and your Social Media Apps Buttons. Think about all you’ve done with this one Widget.

Not all of that information has to be shown. Back in that Widget area you can always go in and uncheck the boxes you don’t want to appear. If you keep your Bio up on your About.me Widget then you might not need the About page at the top of your Header Photo. The About page is one of the most popular spots on my personal Blog. Why do I not show my Bio from my About.me account? Because it takes up a lot of Sidebar space I use for other things. But if you are a minimalist in that regards do what you like. I am just going to show you what is possible.

Well that’s all for today.

See y’all next time.


Much Respect

Ronovan

Ron_LWI


Enter your email address to subscribe to this blog and receive notifications of new posts by email.

© Copyright-All rights reserved by litworldinterviews.wordpress.com 2014

Author Presence: Gravatar.com

Author Presence: Gravatar.com

You have a blog. Either a well established or at least one set up with things on it, or you just did it recently with me. Now let’s get your Gravatar. Gravatar.com is a site that you put an image on, as well as other information, that will be used on WordPress.com when you post articles or comment on other peoples articles. And yes, you will be commenting.  So don’t give me that look or attitude. One thing about WordPress.com is that it has a great author/writing community that supports one another.

When you log into Gravatar.com it will basically tell you that you need a WordPress.com blog/account. Now you see why I had you go ahead and just get that out of the way. Now for some things to do that are similar to what you die with About.me.

So you have gone to Gravatar.com and clicked on Create Your Own Gravatar. Now let’s look at the places to go and see here.

My Gravatars

Manage Gravatars

You want to add an image to your Gravatars that you will be seen as around WordPress and other sites that use Gravatar. So think professional. Even if it is a fun photo, make it something universally acceptable. Anyone seeing this is a potential book buyer. More than likely if you look below the blue box that has your email address in it you will see a line beginning with Whoops. At the end of that line it says Add one by clicking here! Click.

You have four options to load a photo from.

  • My computer’s hard drive
  • An image on the internet
  • A previously uploaded image
  • A webcam attached to your computer

Choose your poison.

Whatever you choose you will probably get the page that says crop and finish. Do that, and the next page you rate your photograph as appropriate for whatever age. Now you should be back at the Manage Gravatars page. Your image should be next to your email.

Now for the

My Profile Page

Name and Details

Here you find all the basics like your name, location, display name, and About Me (Think Bio.)

For the Display name it will show whatever your site name is at first, like mine shows ronovanauthor. I will change it to Ronovan Author. As for the About Me part, what I like to do is use something from my About.me account. This way there is some uniformity across all the places that has Bio information about me.

Now you really only fill out as much as you want here. And you put in what you like.

Click Save Profile

You will notice on the right side of this page some options.

Photo Gallery-Yes, you can add more photos.

Websites-You can add your various website address, such as About.me, facebook, Twitter, any other blogs, GoodReads, Tumblr, Google+. You name you got it you put it. Everywhere a person can find you put where else they can find you.

Background-Yes you can load a background image, just like at About.me.

Contact Information-You can put in whatever form of contact you want people to use. Still it’s a good place to go ahead and put what you like.

Verified Services-You can add links to other places like Youtube and the like. (See the Help at the top for details.)

Cyrpto-currencies-You put in your wallet addresses. I don’t do these so not that familiar with them. (See the Help at the top for details.)


You might be thinking how this seems like a lot of STUFF by now. Well you don’t have to do it all at once, because for one thing you don’t have it all. Basically getting that image in there and your name right is good for now AND adding your blog address to the Websites option. You simply go in there, click what you want and you got it. One of my pet peeves is when a person has Gravatar and you see they make great comments on your blog or another blog and you want to check out their own blog. You click their image and no blog there. Sometimes they don’t have one. But most times they never put their blog in the Websites page.


This isn’t hard so far, right? Tedious? Maybe because of repeating some information. But you want to have everything in place and ready to go when your book is ready to go.


Until Next Time

Much Respect

Ronovan

Ron_LWI


Enter your email address to subscribe to this blog and receive notifications of new posts by email.

© Copyright-All rights reserved by litworldinterviews.wordpress.com 2014

Author Presence: Create a Blog and your Twitter Bio

Author Presence: Create a Blog and your Twitter Bio

During the previous article we talked about Your Brand Name. If you missed it, you really need to check it out as it will come in handy understanding the importance of what I mean by this and how important it is to you.


What are we talking about today?

We’ll discuss two things today.

  • Creating a blog with WordPress.com
  • Twitter Bio

So why are we doing two things today?

For one thing these will be relatively short and another thing, I want each day to be useful for everyone joining in. So for those with blogs, you might get something out of the Twitter Bio.

Blog Talk Time

Creating a Blog with WordPress.com

When you go to the site you will see where you type in a name and then click create blog. Once you have done this the fun begins. Don’t worry about today being intense, it won’t be. And you know what? If you change your mind about the blog name afterwards, you can create another blog with this same account. That’s right, you can create several blogs with different blog names/addresses within the same account. I have RonovanWrites.WordPress.com AND LitWorldInterviews.WordPress.com under the same account. Sure I might could have done it separately but I wanted to be able to keep up with the activity on both at the same time.

For this I am creating a new blog called Ronovan Author so as we walk through I will fill in things appropriately

There are four fields to fill out on the

Get started with WordPress.com screen

E-MAIL ADDRESS–ronovanwrties@gmail.com

USERNAME–ronovanauthor

PASSWORD

BLOG ADDRESS–ronovanauthor  ( the wordpress.com part is already there for you)

Once you have filled in these you scroll down and click Create Blog under the FREE column. I mean you can do the premium ones if you like as they do have things like more space, but often times you probably want to at least try out blogging first. You can always upgrade at any time.

  • You will get two emails; one to confirm your email address and the other one saying you have your blog.
  • After you clicked Create Blog under FREE you will be taken to another page.

Step 1

Set up your blog

Blog Title–Ronovan (I could keep it as RonovanAuthor but not right now, although it might work. I can always change it at any time.)

Tagline (Optional)–Author of Imaginations and Realities

Language–English (Yes you can set it to different languages)

Click Next Step

Step 2

Choose a theme

It looks like at the moment the default Theme is one called Reddle. It’s fine to go ahead and just click on Next Step here as you will be able to change your Theme later. Your main goal today is to get your blog name and get to the point where you can start customizing, not that we will be doing that today. So don’t worry.

Step 3

Customize your blog (Reddle)

It tells you about the Theme but don’t worry about it right now. And when you see words like ‘custom colors’ and things like that, often times you have to upgrade to premium to get those.

Click Next Step

Step 4

Share your blog posts with family, friends, or followers

Basically it is wanting you to connect your blog to facebook or Twitter. We will be doing this later, but if you want to you can now. I will still be going through connecting these two at a later date.

Click Next Step

Now it will want you to create your first blog post. You don’t have to.  At the top of the screen you will see; Reader, My Sites, and Stats. You can click on any of these if you like and just look around.

Today I want to show you the ‘Dashboard’. The Dashboard is where you will spend a lot of time. You will create your blog post/articles here. You will select your Themes, create pages on your blog, and pretty much everything.

Click on My Sites at the top.

Now you will see all of your blog sites. By the blog you just created you will see a gear in the top right corner of the picture. Click the gear and then click Go to admin dashboard.

One thing you will see is a Welcome to WordPress.com Video. I want to say I watched it and it is rather useful so go ahead and watch it.

And that ends your Blog Talk for the day. You have created a Blog, an Author Blog. Next time we speak about Blogs I will want to give you some Theme ideas to use. The reason I want to discuss Themes before we get into the details of the Dashboard is because not all Themes have the same Dashboard options. But they all work basically the same way with just a few  Appearance differences.


Twitter Talk Time

The Twitter Bio

You might be wondering “I’m an author of YA SciFi/Fantasy/Dystopia.”

Nice. Yawn. Sorry, did you say something?

Yeah, that was a bit mean of me but I’m here for Straight Talk. In fact at times I do articles with the titles in them called Straight Talk with Ronovan. So let’s get to it. Your Bio needs to say who and what you are.

Here is my Twitter Bio:

Author. Promoter of Authors. Interviewer. Lover of History. Tacos are a food group.

Yeah, it’s not the best in the world. But it tells you what I am and do. It gives you a couple of insights into me. I love history, I obviously am a huge fan of tacos (humor there) (not really) and I have Fibromyalgia. I also have both of my main blog sites included.

I have had people follow me because of the Fibromyalgia. I have people comment on their agreement about Tacos being a food group. And I have had people say they Love History too. I apparently have some sense of humor by including the taco comment.

Be as creative as you like. Remember, be professional.

Neil Gaiman is famous. Being famous makes it a bit easier with the Bio but he still has to be somewhat creative.

“will eventually grow up and get a real job. Until then, will keep making things up and writing them down.”

Perfectly done. His sense of humor is there and he actually tells what he does in a creative way. In fact I need to rethink mine. Look around at your favorite authors and DON’T copy them but see how creative they are.

Jim Butcher is another popular author these days. Yeah, I met him and talked with him for a while during the first round of Dresden Files books. Was a really nice guy and humble.

“–Storyteller. Let’s not complicate things.”

Honestly, I can hear his Harry Dresden character saying this. Well not the storyteller part, but it is definitely Butcher’s writing style coming through in so few words.


Until Next Time

Much Respect

Ronovan

Ron_LWI


Enter your email address to subscribe to this blog and receive notifications of new posts by email.

© Copyright-All rights reserved by litworldinterviews.wordpress.com 2014


%d bloggers like this: