It’s a good idea to find out how to publish your first eBook on Amazon before, or while you’re writing it. Simplicity is the key, and if you have too many bells and whistles going on formatting wise, you might end up having to clear all formatting and start from scratch. If you use a word processor other than Microsoft Word you might have to pay for formatting, but using Word makes the process very easy. Here’s a quick overview for a standard work of fiction without images. (Click on the screenshots to view them larger)
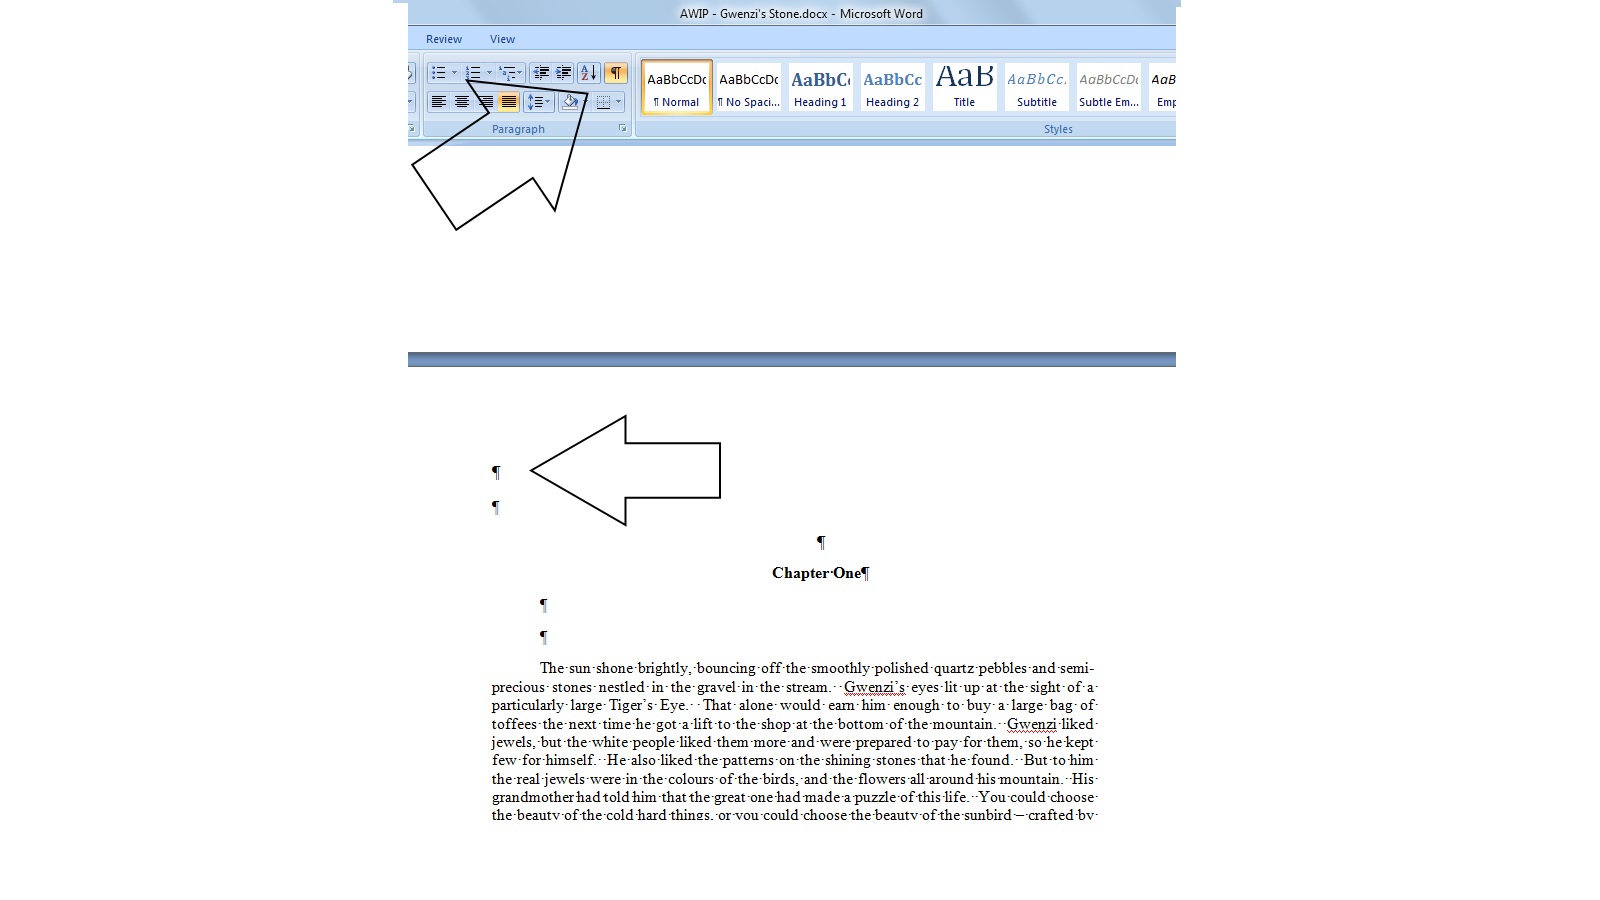
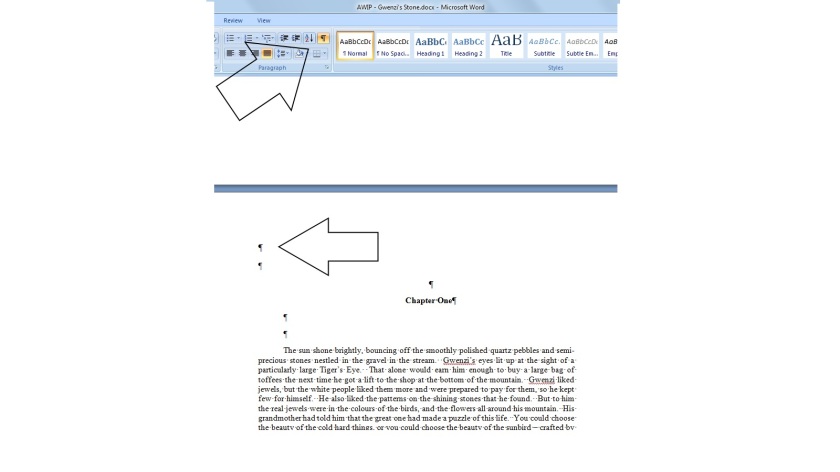
Don’t use lots of spaces or your tab key for indents. This could result in an ebook that’s a bit of an oops. Rather set up the whole document. You can do this from your first paragraph, or you can highlight the whole document and set it up. Do this from a clean document only after you’ve removed any indents, spaces and so on. Use the Show Hide feature to check.
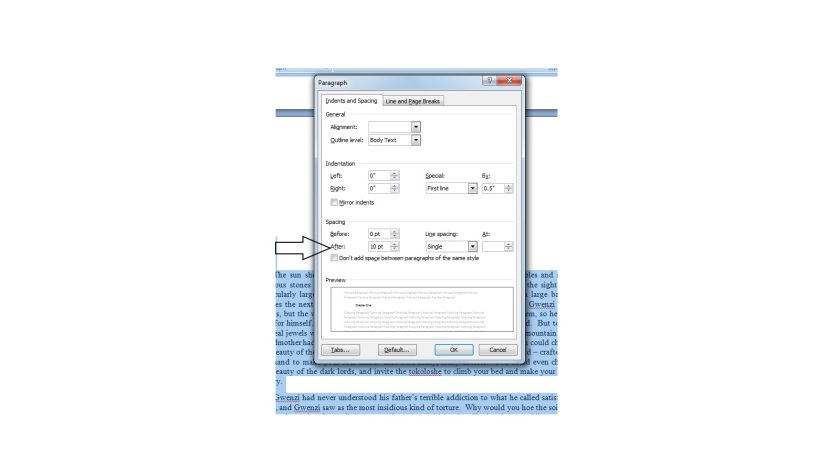
Go to your Page Layout tab in the top ribbon of your document, and then click on the little arrow to the right of the Paragraph selection. Select Indents and Spacing and change Special to First Line, and then change By to your preferred size of paragraph indent, and that will do your indents automatically for the entire manuscript from then on.
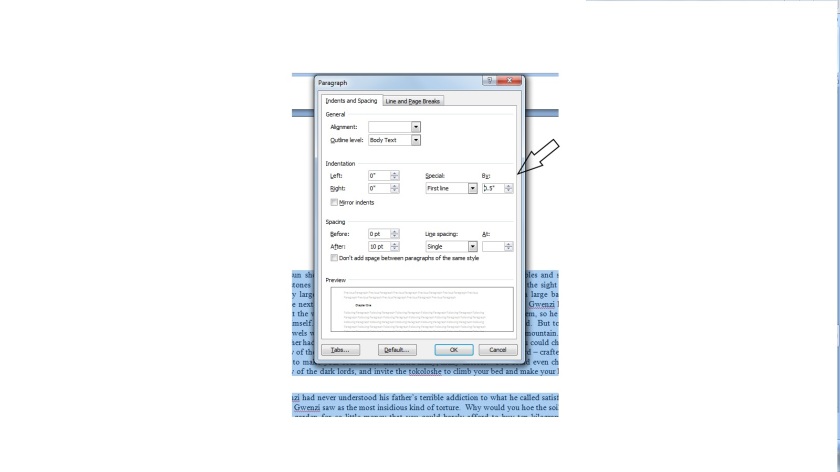
Then, in the same box, set your automatic spacing between paragraphs, so set your Spacing to your desired size, and set line spacing to Single.
While writing, insert Page Breaks before each chapter and don’t use headers and footers. Also no page numbers for your eBook. Kindle only uses seven basic fonts, and readers can change them according to their preference. They can also change the font size, so 12pt is probably the easiest size to choose. It’s best to use a simple font like Times New Roman or Garamond, but that’s entirely up to you.
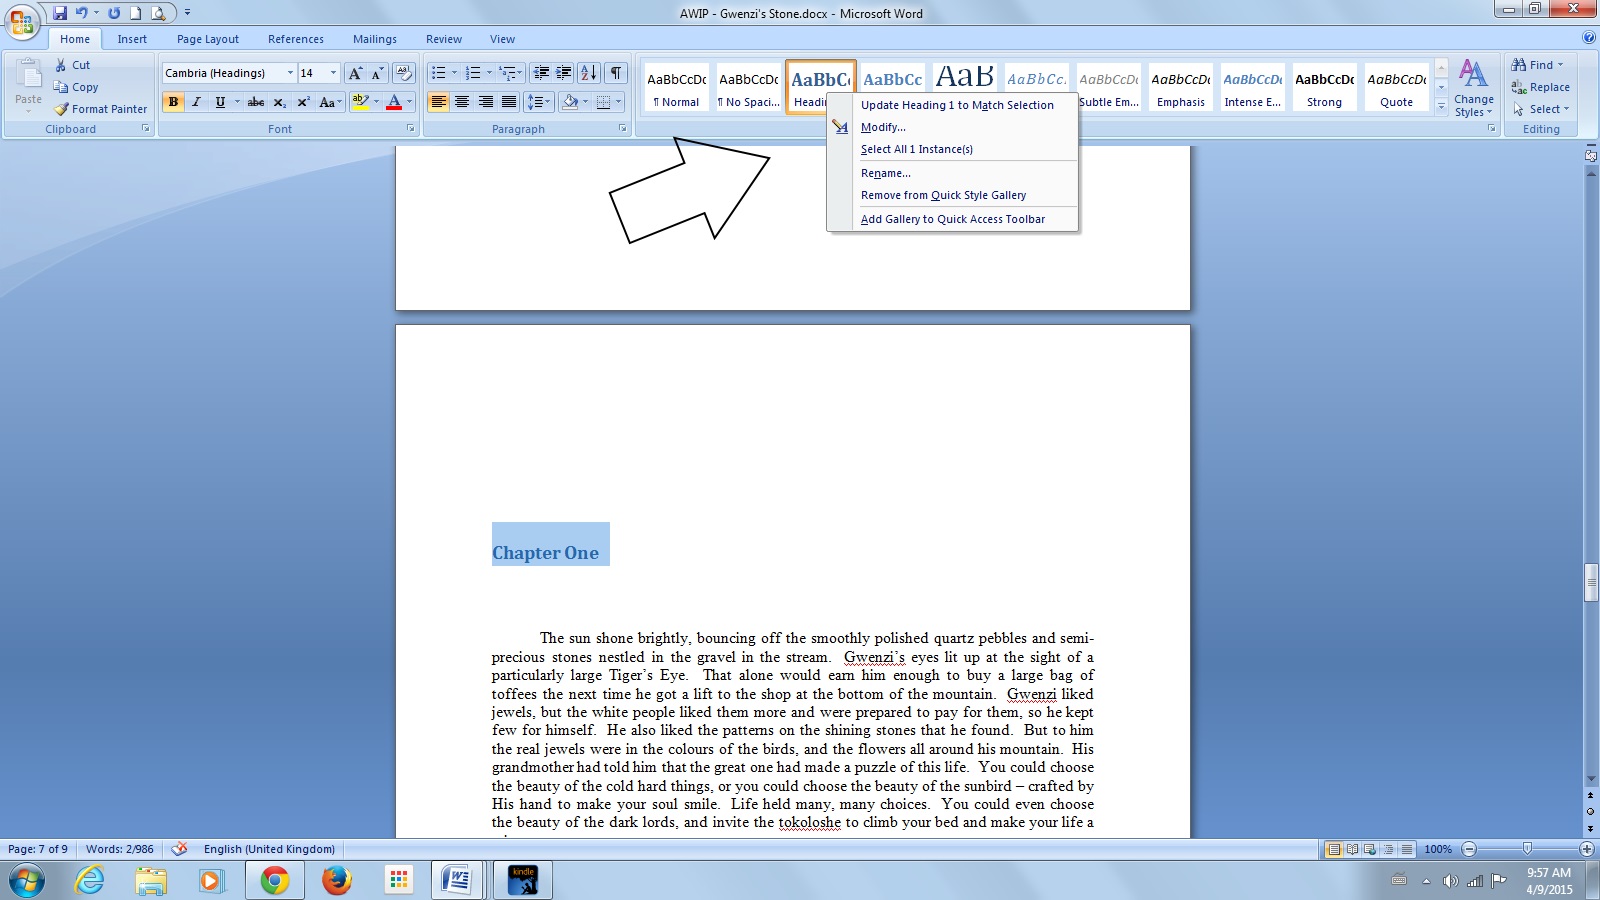
Then you decide if you want a table of contents for your book. If you do, from your Home ribbon, highlight your first chapter heading, and then click Heading 1. You can right click on the Heading 1 box to Modify Font, Size, and Justification for your chapter headings. Once you’ve modified to what you prefer, right click on the Heading 1 box again and click on Update Heading 1 to Match Selection. Then zoom through your book and highlight each chapter heading, click on Heading 1, and they’ll all be the same.

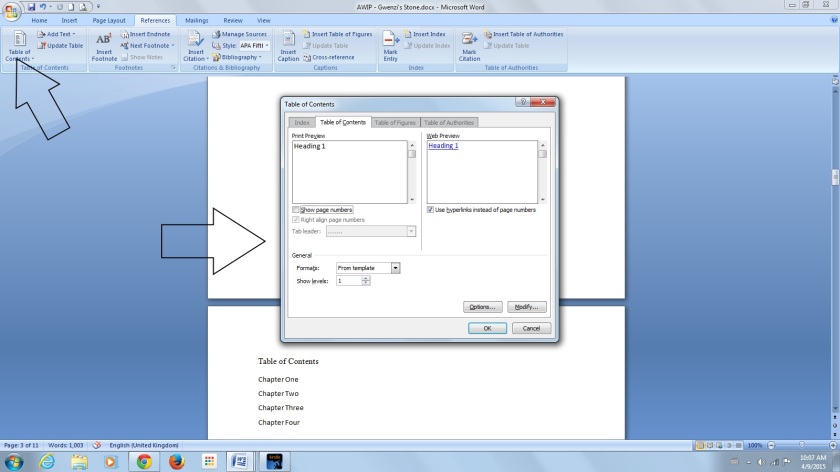
Once you’ve done that head back to the front of your book where you’ll need a blank page. Type the words Table of Contents using left alignment, and press enter. Click on the References tab in your top ribbon, then Table of Contents > Insert Table of Contents. Uncheck Show Page Numbers, and set the Show Levels box to 1. Click OK, and voila! Your Table of Contents will magically appear. To test it, use Control > click over one of the chapters in your TOC and it should take you there.
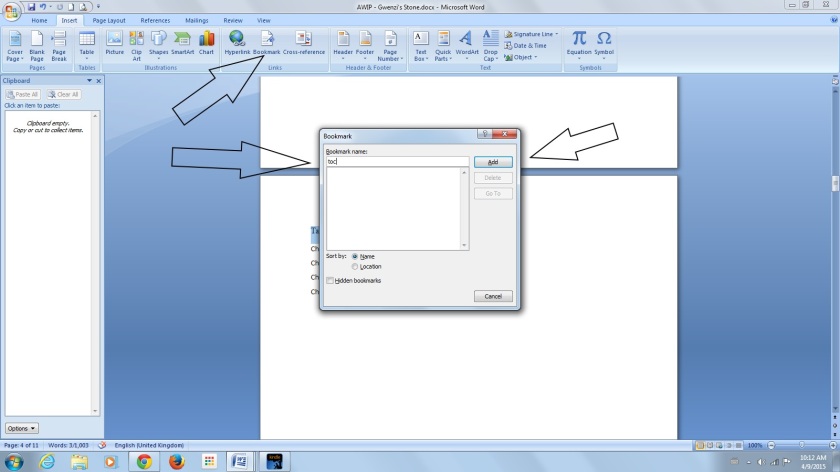
Now to bookmark this. Highlight only the words Table of Contents. Select Bookmark from the insert tab on your top ribbon. Type in toc and click Add in the box that pops open, and you’re done with the fiddly stuff.
Assuming you’re done with your final proofing and edits, go over your manuscript, and check that your front matter is looking good. Insert page breaks between your title page, copyright page, and any other things you have there, such as a forward, prologue, dedication, or editorial reviews. One thing I haven’t done yet in all my eBooks is add a description in the front, although I’m going to. These days we have so many books on our Kindles that we forget what they were about, so a little blurb there is a nice idea.
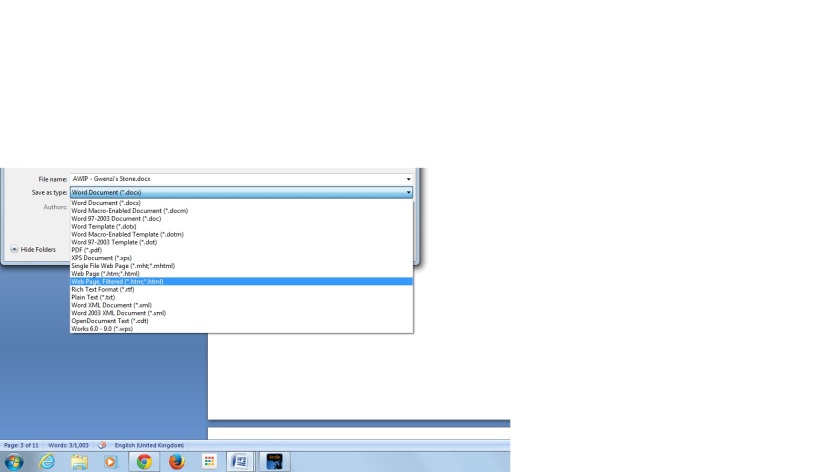
Then check that all your links to your website or any other books are clickable, finally Save this document, and prepare for takeoff. After saving all your hard work, go to the Save As function in the top left corner and select Other Formats. Next, under the File Name select Web Page, Filtered in the Save As Type box. Click yes when the warning comes up. You’ll see that you now have your original document, and also a HTML document of the same name. The HTML is what you’ll be loading on to Amazon. (If you have images in your book, you will need to load a compressed file onto Amazon, so this is only for manuscripts without them)
Have your cover ready separately as a jpeg or tiff image. I use nice quality high resolution images sized at 6.25 x 9.5. You’re ready to rock.
If you haven’t already, open your account at Amazon KDP, and fill everything in. If you don’t live in the USA you have a couple of tax options, including allowing Amazon to withhold tax until you get around to getting to the proper processes. You can still publish and earn royalties until you do, and any withheld taxes will be paid to you when the necessaries are done.
Go to your Bookshelf. Click on Add New Titles, and take your time filling in all the fields. Especially don’t rush through the Categories and Tags. These are important for your book’s visibility. Select your Royalty. This can change for each book you publish. Books $2.99 and up get 70%, and below that get 35%. Put your book blurb in Description, add yourself as the author in Contributors (and any other contributors that should be there), state your right to Copyright and not Public Domain, and now it’s time to upload.
Your book file and cover file get loaded separately, both very simple processes – you just upload straight from your computer, and wait to be told that each upload is successful. Click on Upload Book, browse, and select the HTML document to upload. As soon as you see Upload and Conversion Successful, you get various options to review. I always download the Mobi file to go through on my Kindle for PC, and also to check on my actual Kindle, as well as paging through the online reviewer. Once you’re happy, click Save and Publish. Your book will then be live on Amazon within the next 48 hours. Set up your Amazon Central page, and find and claim your book.
When you write your next book, you can make a copy of the formatted one, delete the words and retain the formatting, which is a thing that scribblers as forgetful as I am might find useful. Happy publishing Indies.
UPDATE: SEE OUR LATEST ON HOW TO Create NCX Table of Contents using Calibre


 Sewanee: University of the South School of Theology with a Doctorate in Ministry and Johnson University with a Master’s in Theology. He and his wife, Heather, have two children (Katelyn and Nate) and one loyal but lazy dog (Rudy). You can find his book, Judas: Misunderstood Hero on Amazon. Connect with Jason on his site, http://www.jasonroyle.net/ and on Twitter at