How to Create a NCX Table of Contents for Amazon Upload Using Calibre

I have to say that as well as proofreading, creating a NCX table of contents is something I would be more than happy to outsource to a professional and pay for. I’d recommend that if you can afford it. Considering my mission to learn all the aspects of self-publishing myself though, as well as the fact that not all Indies have the couple of hundred bucks in their budgets for this, I decided to figure it out myself. I must admit that I wasn’t keen to load any file on to Amazon that wasn’t a nice clean HTML conversion, so I updated my already published books using Calibre with some trepidation. They all worked out very nicely, and now that I understand the logic behind this method I’m all for it. The table of contents we did before works very well for getting a nice clickable table in the front or back of your book, depending where you want to put it, but it doesn’t generate a table of contents in the Go To menus of kindle devices, so this new process should be the one we use because a Logical NCX is mandatory for Amazon.

First of all forget all the heading styles. We’re going to stick to Normal Style for chapter headings for this. Obviously centre them if you like, but keep all your formatting plain as you can.

Choose a page for your book’s table of contents. I used the page directly after the copyright page.

Type out your heading titles or simply Chapter One and so on.

Now you must bookmark each chapter heading in the book individually. Go to each one and highlight it, then go to the Insert ribbon and click on Bookmark. Type your bookmark name without using spaces, for instance, chap1, then click Add. Carry on till you’re done, and then go back to your typed out table of contents, highlight the words Table of Contents and insert a bookmark called toc.

TOC Add Bookmarks

Go through your typed table of contents by highlighting each item, then right click and choose Hyperlink. Select “Place in this document” from the menu in the box. Pick the associated bookmark and click OK. Do this till you’ve done them all.
Next, using the Ctrl Click function from your table of contents, go to each chapter heading and use Highlight > Insert > Hyperlink to link them all back to the bookmark labelled toc.

TOC Link

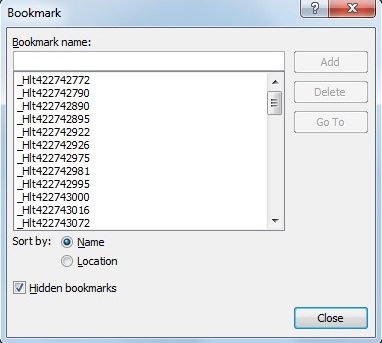
Remove all hidden bookmarks by clicking on Insert > Bookmarks to open the box. Click the “Hidden Bookmarks” box and find any bookmarks that you haven’t added yourself and get rid of all of those by clicking on them and pushing the Delete button in the box.

TOC Hidden Bookmarks

Now save your manuscript and make a copy – just in case, and then use the Save As – Webpage, filtered to get your HTML copy. Don’t worry about the warning that pops up. Save it anyway.

Open Calibre and select Add Book from the top left. Download it for free if you haven’t yet. Find and click on your HTML file. Then click on Convert Book, also in the top ribbon. Fill in the title and your name at the top – this makes it easier to find later. Load up the book’s cover. Don’t load your cover as in the screenshot. You don’t need to for this ePub, and you will upload it on it’s own on Amazon..

Calibre.jpgconvert

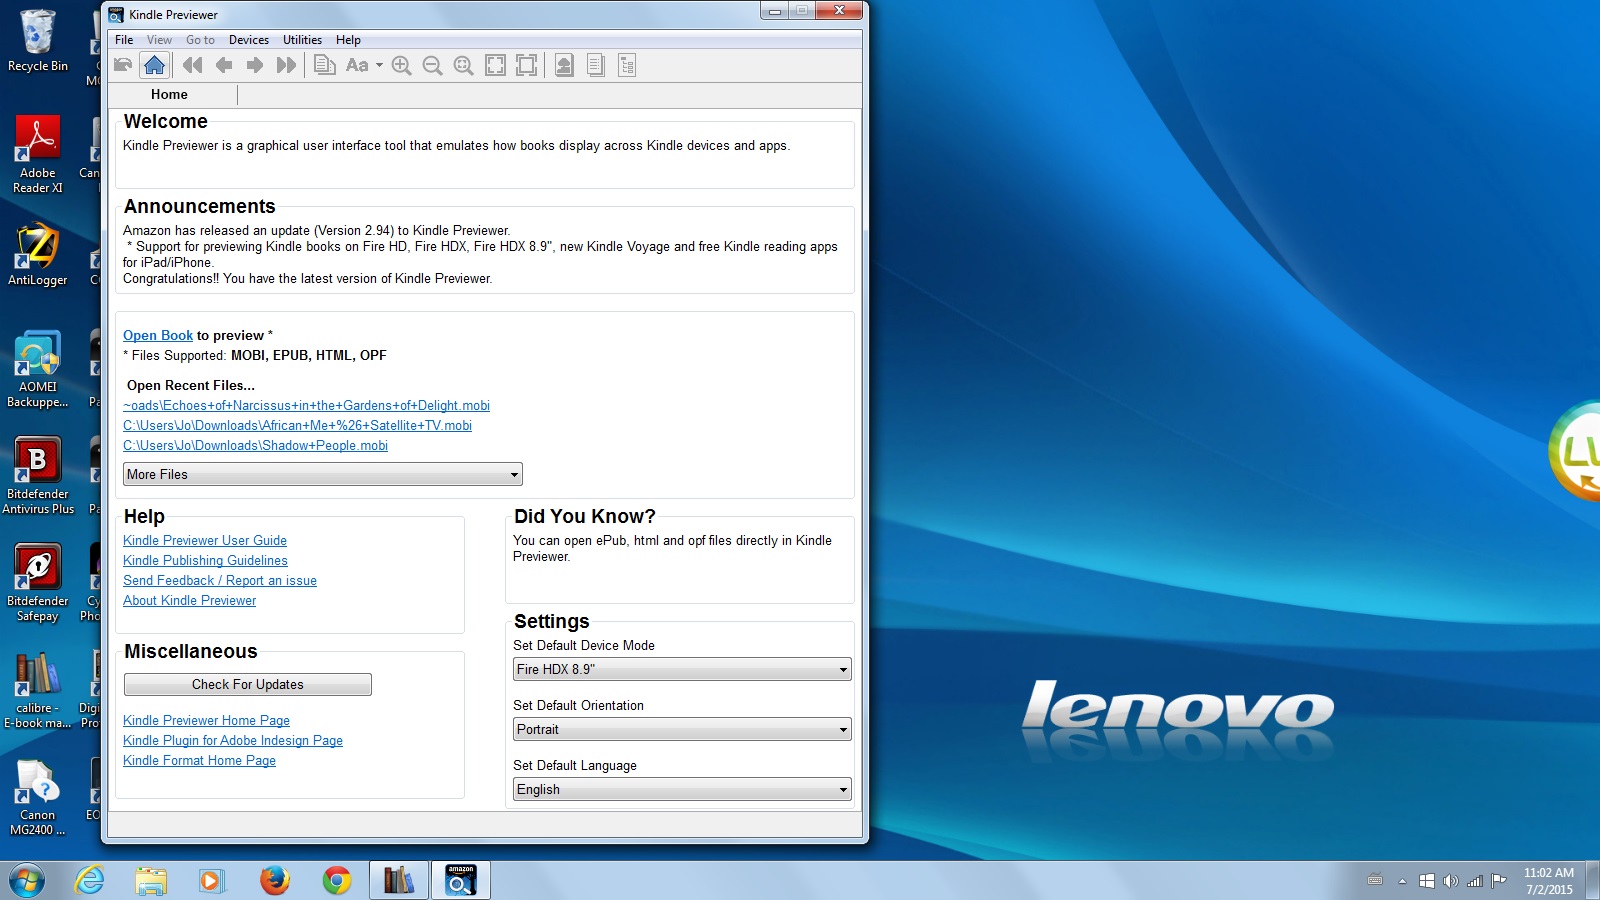
UPDATE:  Amazon will no longer be accepting MOBI files that have not been created using their own software.  I will leave the screenshots as they are below, but the procedure will be slightly different.  This is how to do this now. Select ePub output in Calibre.  Select Force Table of Contents.  Click OK.  Open your Kindle Previewer.  Click Add Book.  Browse for the ePub by going to your Calibre Library situated in the My Documents folder, and select the ePub book you will find there.  The previewer will tell you that it has created the file using KindleGen.  You will find this MOBI file in the same folder that Calibre created with the ePub in it.  Use this MOBI file to load directly on to Amazon.

Go and have a look in each of the boxes down the left of your screen, mainly to familiarise yourself with all options. There’s no reason to be wary of playing around – just delete and start again. Select ePub as OUTPUT in the top right of the page.  Go to the Table of Contents and select Force Table of Contents.  Push OK and wait for the conversion to finish.

Calibre force

When Click to Open appears under the cover picture, click on that, and it will take you to the ePub copy in your Calibre library. When you create a MOBI file for your own purposes, clicking on it and it will open in your Kindle for PC.

Calibre TOC in Kindle PC

Open the Amazon Previewer.

Calibre Previewer

Have a look how it will appear on the three devices there, and check that both your table of contents and also your NCX table of contents are there from the buttons at the top. Then go to the MOBI file that the previewer has created situated in the folder in your Calibre library and that will be what you load up to Amazon when you start the publishing process. Do a double check by downloading the preview MOBI from Amazon after that, as well as using their online previewer to be a hundred percent sure that all the formatting and breaks in your book are looking good, as well as your NCX table of contents.

Calibre Previewer tocCalibre Previewer ncx view

Last but not least. Typing in the correct code and splitting a book up to generate a NCX table of contents is obviously the correct way to go, but not for people who don’t understand HTML much better than most intrepid Indies. You can happily load the Calibre and Previewer MOBI up this way, because you are following their guidelines properly. The way I understand the NCX TOC is that it’s some sort of hidden “spine” in the metadata of a book. Calibre does all that magical stuff for us. and the previewer does the rest without us having to learn computer coding at all..

Amazon’s Logical TOC and Author Review Rules

I’ve posted about reviews and inserting a table of contents into your eBooks before, but I wanted to discuss them again, with special emphasis on Amazon KDP rules.

First, just a quick word about the table of contents. I’m editing a non-fiction book that I want a proper NCX table of contents for, that shows up in the little Go To menu itself, so I’ve been exploring Amazon’s guidelines. I wasn’t aware before that fiction had to have a logical table of contents, but it is now actually a requirement, and authors are starting to get notices from them to put them in their eBooks if they haven’t already. The HTML table of contents that we did here previously is Strongly Recommended by Amazon as well, but the Logical one is a requirement. This table of contents according to Amazon “Lets the reader easily find parts, sections, and chapters of your book from the Kindle Go To menu. Lets the reader see how far along they are in the book. Especially important for books longer than 20 pages.”

This is not an easy process to find out about. I dug around for weeks finding all sorts of conflicting – and mindblowingly confusing – instructions, that seemed to me only a computer programmer would understand. At the end of all that I found that if you convert your HTML manuscript with HTML table of contents in it to an ePub using Calibre, and then load the ePub on to Amazon, the NCX Logical table of contents appears in the Go To menu. Later, after I’ve finished successfully converting all of my own books, I’ll do a proper post with screenshots of the whole process. In the meantime, it’s something for you to start looking into if you haven’t already got these in your eBooks.

Then the reviews. Amazon is on the warpath right now as far as paid for and dishonest reviews are concerned, and us innocent Indies could get hurt as a result of being uninformed. Whether we agree with them or not, we have to follow the rules of any publisher we use, so getting to know Amazon’s policy on this is important. As authors we are allowed to review books by other authors there, unless we have a personal relationship with them, or had a part in creating their book. So, if you’ve designed a cover for a book or edited it, or had any other part in getting it made, you are not allowed to review it on Amazon. Friends and family are only allowed to chat about your book as part of an editorial review which will have to be vetted via Author Central first, or on the Discussions feature – where it says “Start a Discussion” at the bottom of your book’s landing page. They are not allowed to review it on Amazon. Obviously, no paid for reviews other than paid for editorial reviews, for example from an expert in your book’s genre.

By paid for, Amazon also means that if you receive a gift certificate for a book in exchange for a book review this is a paid for incentive, as is asking for a review as a condition for entry into a competition, among other incentives. Swopping reviews with other authors is also not a fabulous idea. As Indies we want to support each other, and we are so grateful when we do get a wonderful review, that we buy and read the reviewer’s books, and leave our honest reviews for them too, but I think that doing that now would be dangerous – for both of you. Amazon may frown on the author whose book you reviewed as well as you if it looks like a “review for a review”. So, if you really want to review a fellow author’s book if they have already reviewed any of yours, rather do so by posting it on sites other than Amazon, such as Goodreads and your blog. At the end of the day, if we want to carry on publishing with Amazon, we must abide by their rules. Even though we know that we truly are posting one hundred percent honest reviews, there are quite a lot of people who don’t, and getting your books booted off Amazon – which is a possibility here – would be an absolute disaster for any new Indie author out there in today’s publishing environment.

1197107206400036309metalmarious_Laptop.svg.hi

Should you Sell eBooks from your Website? @JoRobinson176

Many web owners sell books directly, and sometimes exclusively from their sites, collecting one hundred percent of the price via PayPal. If you publish with Amazon KDP Select, this is obviously not allowed – in fact, if your book is with Select, you are only allowed to distribute the digital books through them, and only the selling of your paper books after ordering them from your POD supplier is considered kosher.

If you’re not with KDP Select you can sell them anywhere you like, so the website option then becomes viable, and a very good idea too. As an independent publisher you get to try a variety of avenues for selling and marketing your books. We all know about Smashwords and all the other sites where you can make your books available to buy. It’s quick work to load them up there – although – not such quick work to get them taken down by the way. I unpublished two of mine from Smashwords months ago, and I’m still trying to get Barnes & Noble to remove them from their site so I can enrol them in Select again.

So there are all these options open to you for spreading your books far and wide, but do consider having one or two for sale directly from you. I’m in the process of getting a couple ready for this very thing. Many of us use WordPress.com. Me, because the thought of hosting my own website terrifies me, but moving to WordPress.org in the future will be necessary because of Google visibility.

You can’t install a PayPal button and sell your books from WordPress.com, although that needn’t be a hindrance. Why not set up your own website with a link to it in your sidebar? Setting one up is only a little work to begin with, and then occasional updates after that. A nicely designed static website is a great thing to have to use for all your future promotions, sales, new releases, and a great way to showcase yourself and all of your books.

A couple of free website hosts are Weebly, and my favourite, Wix. It shouldn’t take you more than a day to get it looking nice and professional. One little tip though – take your time picking your theme and theme fonts, because once you publish and go live you can’t change those. It’s up to you how much you use your website. You have the option of a blog to go with it, which you can use weekly, bi-weekly (or not at all), and share links to pages from there to all your social networking sites regularly, so it needn’t be something that stagnates. Wix has a lot of really lovely, and easy to use features, and setting up your PayPal button is the work of minutes.

Once you’ve got your book written, proofed, and beautifully formatted, convert it to an eBook format (or a selection of formats, such as PDF, Mobi, and ePub) using free downloadable software such as Calibre. Calibre is a great tool for Indie authors to have, with many useful functions other than book conversion – which is a whole lot more words, and best kept for another day. The important thing is how easy it is to use, with step by step instructions, your books will be ready to sell very quickly. Obviously these books will not be protected from customers emailing copies to their friends, but the same applies to every eBook you ever send as a prize or review copy, so that is a thought – the ever present and growing piracy. The customers who do buy it from your website are unlikely to be buddies with each other though, so you probably won’t lose any sales if they do send it on to their grannies and so on, and pirates prefer not to spend a dime at all mostly.

Whether you write something specifically to sell yourself, or experiment with a book you’ve already written that may not be doing so well, it is always an option for the Indie writer. Some authors are making a lot of money this way, especially those in the health and recipe book sector, so if there is a book lurking in you that would help or add value to readers enough for them to buy straight away, rather than taking the time to look for it online, go for it! I personally can vouch for the quick finger of the impulse buyer, and I can’t think of one bought this way so far that I regret buying, and the more you are spread around, the more visible you will be – always a good thing.

11970983281171911309SteveLambert_Library_Book_Cart.svg.hi

%d bloggers like this: