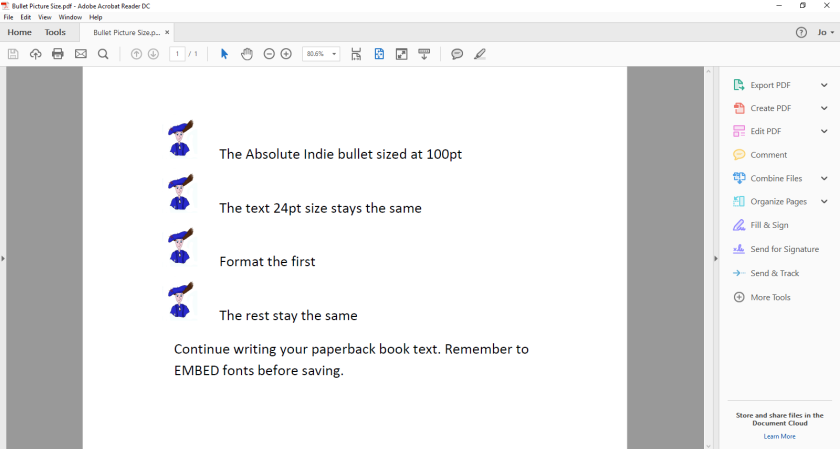
Microsoft Word is powerful software and generally the Indie author’s friend, but sometimes its intuitive automatic tweaking can cause headaches that can take days to get to the bottom of, and at other times lead to giving up on certain looks we want for our books altogether. Non-fiction books in particular regularly have bullet lists in them, and if you have lots of bulleted lists in any particular book you can end up with dodgy margins, among other unattractive changes.
It’s common knowledge among self-publishing authors that Word generated bullet lists and Kindle books are not the best of friends. The easiest ways around this are to either to manually insert bullet symbols at the beginnings of each sentence of the list, or to create the lists as images in software built for the purpose, or to use Canva or some similar online image creation site. Here’s an example of using a screenshot of a list as an image.

We can be much more creative with our POD paperback books than with the limitations Kindle books give us because once the fonts are embedded, and the manuscript is saved to PDF, what you see there is locked in and will appear that way in your print book. Sometimes with bullets though, Word itself gets creative in ways that are hard to fathom or change. For instance, certain bullets mysteriously change size, leaving your lists looking patchy and irregular. There is no obvious place to change them no matter how deeply you dig into your formatting ribbons. Luckily there are ways, not only to change or regulate your bullet sizes without at all affecting text size, but also to get creative and add personalised-particularly-for-your-book bullets. Once they’re embedded in the PDF file, they will appear beautifully in your paper book. Here’s how you do it.
Firstly, to change bullet size without changing text size, simply use the Show/Hide function (Click on pilcrow emblem in the Home ribbon ¶ and these will appear where formatting is used in your manuscript). Next Highlight ONLY the pilcrow sign at the end of each item in the bullet list one at a time and change the font size bigger or smaller. This will change the size of the bullet only while leaving the text font size the same.

For a bit of fun, why not try making your own bullets. Firstly apply a bullet to the page and then right click on it. From the dropdown menu select Define New Bullet from the Bullet Menu. Choose Symbol or Font, or for your own personalised bullet, choose Picture and browse your computer for an image, load it up and there you have it!


If it’s too small use the above process to enlarge your bullet picture without making the text to large at the same time. This way you can make your non-fiction print books wonderfully individual to you or your book’s topic.
Next EMBED and Print to PDF for upload to your POD platform.


Reblogged this on Jo Robinson.
LikeLike
Reblogged this on Smorgasbord – Variety is the spice of life and commented:
Jo Robinson sharing more of her essential formatting skills with us. There are a number of challenges facing self-publishing authors and formatting is a key element to the readability and therefore success of a book..#recommended
LikeLiked by 1 person
Thanks for sharing Sally!
LikeLiked by 1 person
Pleasure Jo.. hope to catch up when you have time my friend. xx
LikeLiked by 1 person
I reckon I’m touching ground again Sal – will enjoy catching up with you now! XXX
LikeLiked by 1 person
Super.. XXX
LikeLiked by 1 person
Very useful advice, as always, Jo!
LikeLiked by 1 person
Thank you Cynthia! Am getting ready to email you tomorrow by the way with a load of Myrtles. X X
LikeLiked by 1 person
That sounds funny — “a load of Myrtles”.
LikeLike
ur fat
LikeLike
Reblogged this on Chris The Story Reading Ape's Blog.
LikeLike
Thanks for the helpful article!
LikeLike
Reblogged this on When Angels Fly.
LikeLike
This is enormously helpful. Thanks so much. 🙂
LikeLike
Reblogged this on Viv Drewa – The Owl Lady.
LikeLike